Illustrator Tutorial Make a Glossy 3d PushPin
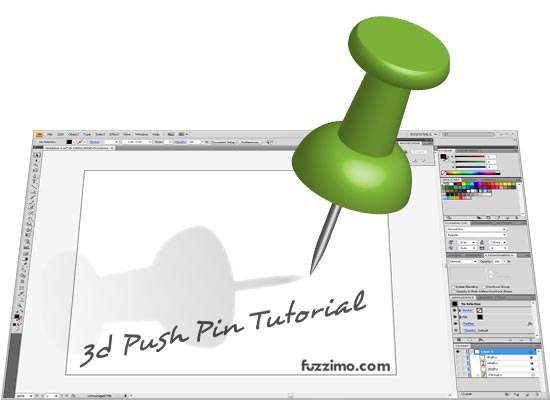
Here’s a simple illustrator tutorial on how to make a shinny 3d push pin using the Revolve Tool. If you only want to download some vector pushpins and adhesive notes check out my post here. Using the Revolving Tool can be a lot of fun in creating complex 3d objects out of a simple 2d path.
1. To begin make a new illustrator file and save it as ”PushPin3D”. Don’t forget to save your work often.
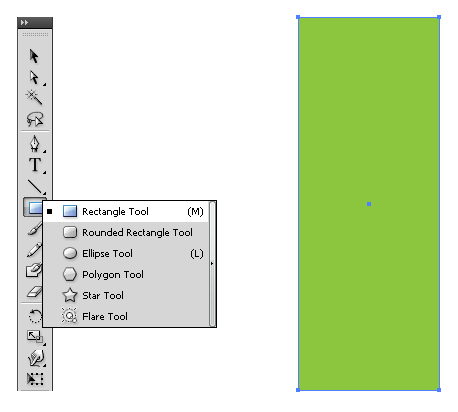
2. The idea here is to make a path as if you would dissect a pushpin right in the center. Select the Rectangle Tool (shortcut key M) and click and drag a rectangle like in the image below; in the color window (if it’s not open go on the top menu bar to Window > Color or just press F6) give it the fill color that you like, in my case green, and no stroke.
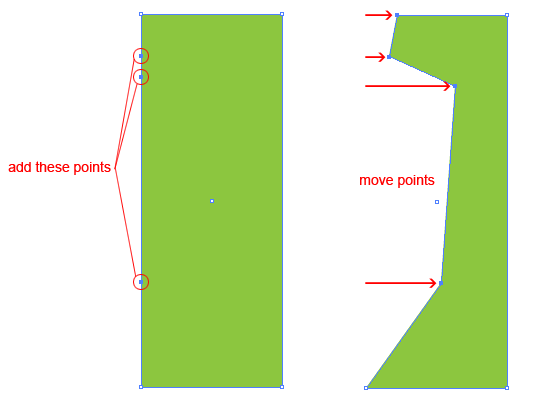
3. Time to add some anchor points to the rectangle that you just created so you need to grab the Add Anchor Point Tool (press +). Add three anchor points on the right edge of the rectangle. Get the Direct Selection Tool (A) and move the anchor points inward so it looks more or less as in the image below.
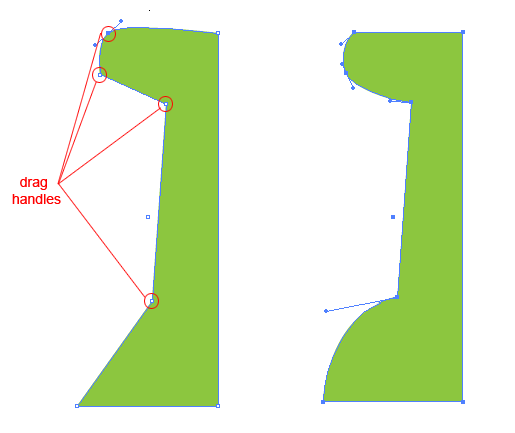
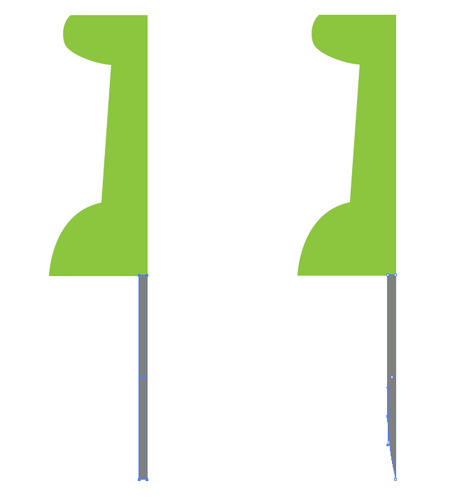
4. Select the Convert Anchor Point Tool (Shift+C) and click and drag on the upper anchor point to get the handles. You only need one handle so to remove the upper one click with the Convert Anchor Point Tool on its end to delete it. Click and drag handles for the rest of the points and in the end it should look as the right side in the image below.
5. Select the Rectangle Tool (M) and drag a narrow rectangle as in the image below. Give it a gray fill and no stroke. This new path will be the metal part of the pushpin. Now grab the Direct Selection Tool (A) and select the bottom left anchor point of the rectangle by clicking on it. Make sure you have only this point selected. Move it up a little to create the sharp end of the pin (while moving the point you can hold the shift key so you can drag it straight up perfectly). To make the needle a bit more realistic grab the Convert Anchor Point Tool (Shift+C) and give it a very light curve
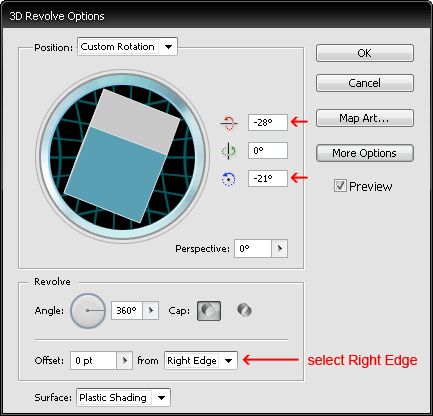
6. Now it’s time for some revolving. With the Selection Tool (V) select the green path; go to the top menu Effect > 3D > Revolve. In the pop up window check the Preview box and you will see a cylinder, but no worries, after choosing “right edge” and you will have your 3d pushpin. You can play with the 3d box to get the desired orientation. I used “-28,0,-21” as you can see in the image. When you’re finished press ok to close the 3d Revolve Options window.
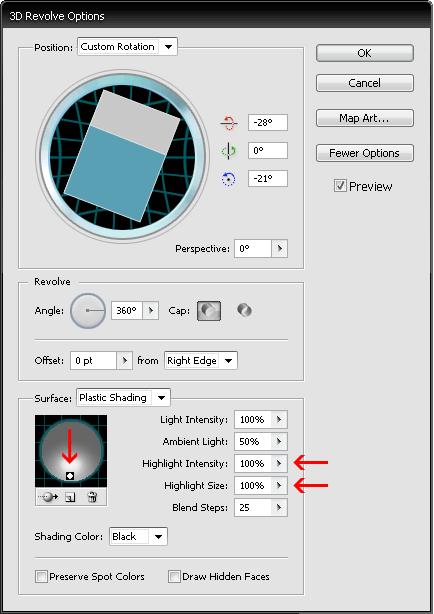
Now select the gray path and go again to top menu Effect > 3D > Revolve. Make sure you have preview checked and select as before “right edge”. Fill in the numbers that you used for the green path, in my case “-28,0,-21”. Now it looks like a sharp pin, but it’s a bit dull in color so press More Options to play with the lighting and shading. Here move the light to the bottom and change Highlight Intensity and Highlight Size to 100%. Click ok to close the revolve window.
You should have something like this:
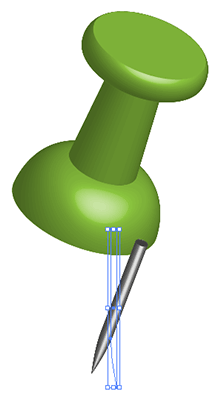
With the Selection Tool (V) move the gray pin section so it’s aligned in the center of the green plastic. Then right click on it and Arrange > Send to Back. And you have finished the Pushpin.
Note: Later on if you want to change the Pushpin’s perspective select the green path and then in the Appearance Window (if you don’t have it open then either go to top menu Window >Appearance or press Shift+F6) you have the 3drevolve effect. Replicate the settings for the gray path as well.
If you want to add a shadow for the pushpin then here’s how:
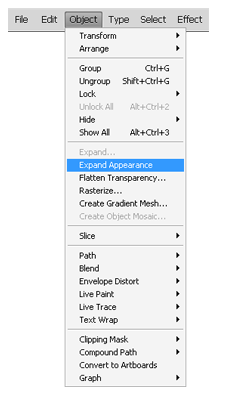
7. With the Selection Tool select both paths and group them by either right click > Group or Ctrl+G. Now click and drag on the group while holding the Alt key to make a copy. With the new group copy selected go to top menu Object > Expand Appearance
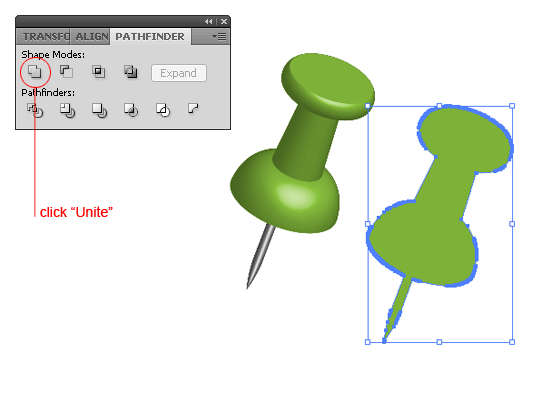
In the Pathfinder Window (if it’s not open Window > Pathfinder or Shift+Ctrl+F9) click on the unite to join the paths.
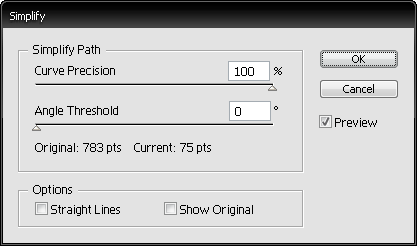
Now the new path has way too many anchor points so to take care of that go to top menu Object > Path >Simplify. In the simplify window put 100% in the curve precision.
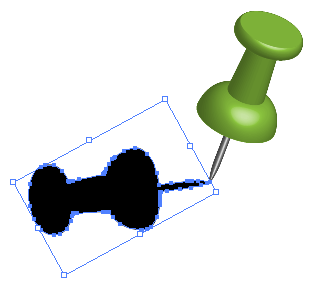
8. With the Selection Tool (V) move and rotate the path so it aligns more or less as below. Give it a black color fill.
9. Now we are going to make an opacity mask; with the Rectangle Tool (M) drag a rectangle to cover the black path. Give it a grayscale gradient fill with black on the left. With the Selection Tool (V) drag to select the black pin and the gradient rectangle.
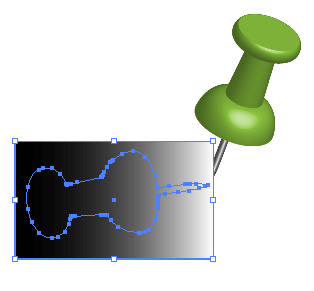
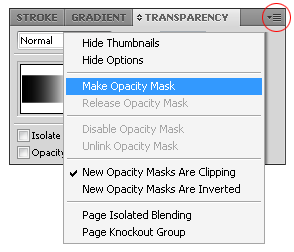
In the Transparency Window (if it’s not open Window > Transparency or Shift+Ctrl+F10) click the little box in the upper right corner and choose Make Opacity Mask.
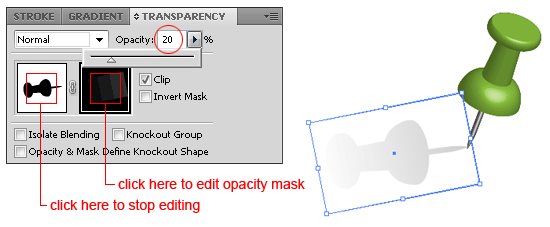
In the Transparency Window click to select the opacity mask and then rotate it a little to match the angle of the pin. Drop the opacity to 20% or to whatever you like. To exit the edit opacity mode click on the pin in the transparency window.
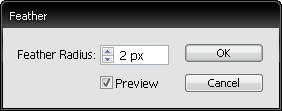
10. To smoothen the shadow edge go to top menu Effect > Stylize > Feather… and in the option window put 4px or however much you want to blur the edge.
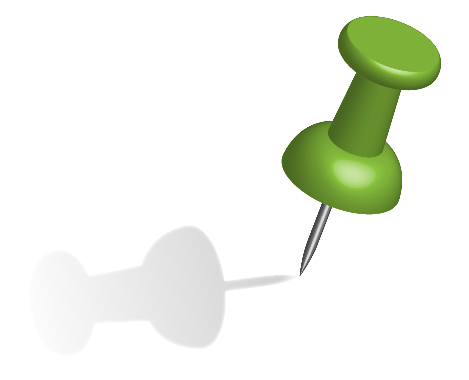
The final pushpin should look like this:

this one is SO cool! :)
very fine finish vector 3d
very fine finish
Thanks this helped out a bunch!
That’s really cool! thanks :)
Great tutorial. Really helped me out.
Thanks for the tut and the pin!
Awesome, many thanks!
Awesome
Great Post. thanks for showing us this useful method.
Keep up the good Job!!