Illustrator Tutorial – Make a Glossy Stop Sign
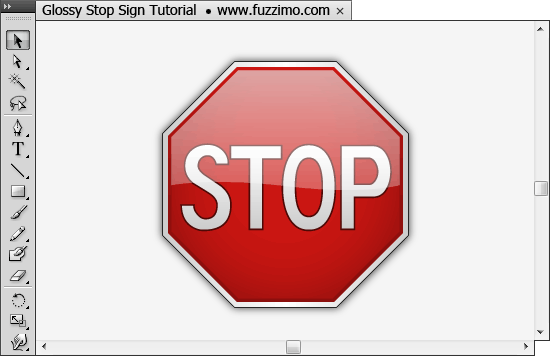
Here’s an illustrator tutorial on how to make a glossy stop sign similar to the one found in my Road Signs pack. Hope you will find it useful for other projects which require some glossy icons or other shiny stuff.
1. First make a new illustrator file and save it; instead of “untitled” maybe give it a name “StopSign” or whatever so you can find it easier later on. I learned the hard way and many times as well that you should save your work often :).
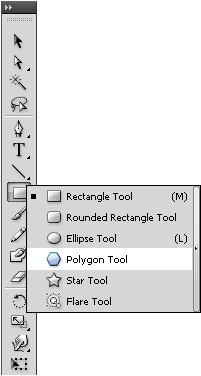
2. Start by selecting the Polygon Tool. To get it left-click and hold on the Rectangular Tool so you get the drop-down list.
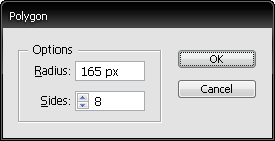
3. Left-click on the artboard and in the options box that appears set radius to 165px and sides to 8.
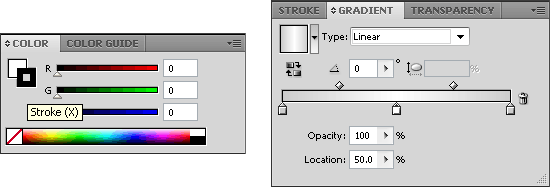
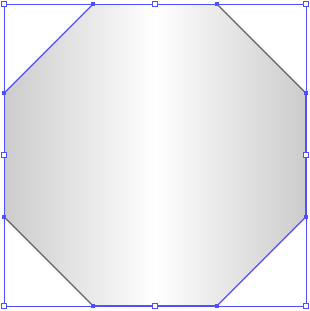
4. Now get the Selection Tool (press V) and with the newly created polygon selected go the color window (if you don’t have it open go on the menu bar to Window > Color or just press F6) and give it a 1pt black color stroke and a gradient fill. In the gradient window (Window > Gradient or Ctrl+F9) add an extra color on the gradient slider right in the middle and make it white and make the outer two colors gray (I used R=204 G=204 B=204).
So now it should look like this:
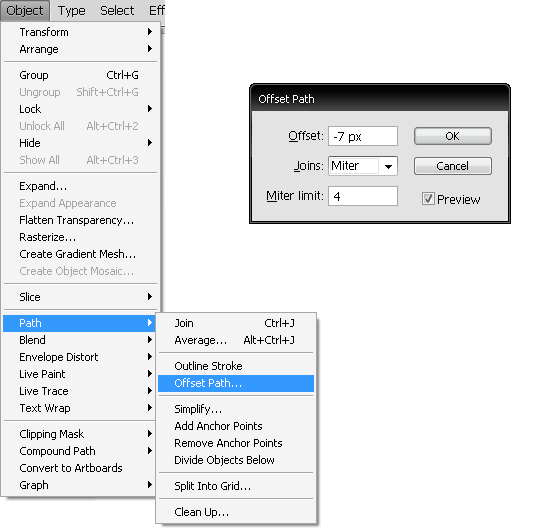
5. On the top menu go to Object > Path > Offset Path… and in the option box set Offset: -7px and click ok.
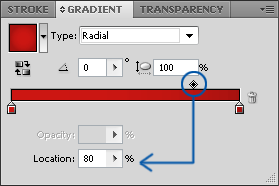
6. Give the new offset path a radial gradient fill and no stroke. On the gradient slider move the midpoint to 80% and change the gradient color stops one to red and the other to a darker red just like in the image. I used red (R=204 G=22 B=18) and darker red (R=166 G=18 B=15).
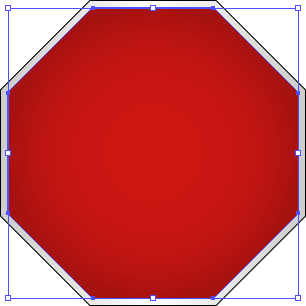
And now it should look like this:
7. Now it’s time to add the STOP text. In my post with Road Signs I traced the STOP font from a picture I had, but you can easily use Arial Narrow or even better Blue Highway by Larabie Fonts which you can get for free here. For this tutorial I will use the “Blue Highway D Type” font, but you can use any clean sans-serif font; so select the Type Tool (or press T) and type the text. Use font size 148pt and also set the spacing between the characters to -22 so it look like below.
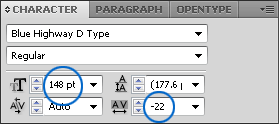
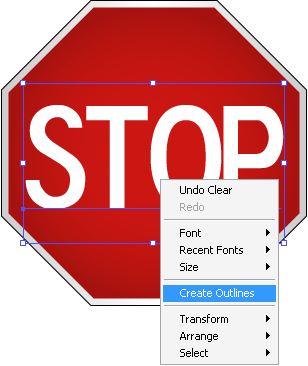
Now press V for the Selection Tool and with the STOP text selected right-click on top and select Create Outlines.
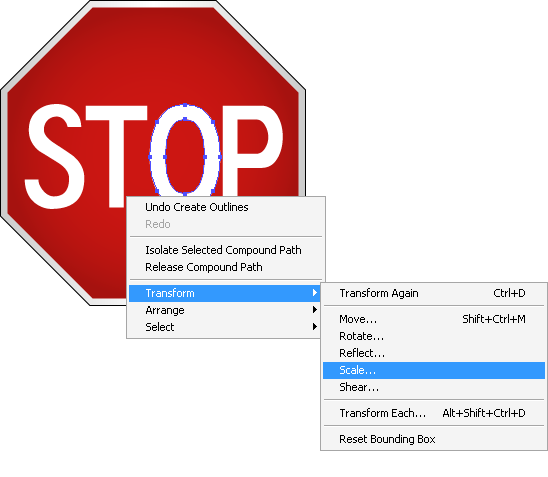
The O in STOP signs is a bit narrower than this one so if you want to fix that get the Direct Selection Tool (press A); if the STOP text is selected click anywhere on the artboard to deselect it and then left-click somewhere on the body of the letter O to select it and then right-click > Transform > Scale…
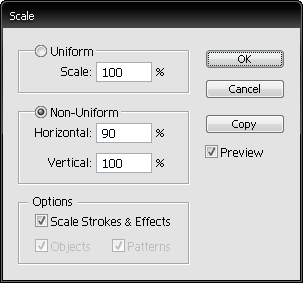
In the scale window set the non-uniform horizontal to 90% and click ok.
With the O still selected press the left arrow key on your keyboard 2 or 3 times to better place the O between the T and P.
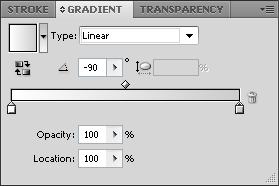
8. Choose the Selection Tool (press V) and click on the STOP path to select it all. Change the fill to a linear gradient and set the angle at -90 and make left color stop white and right color stop gray (I used gray R=204 G=204 B=204).
9. Now go as before to menu Object > Path > Offset Path… and in the option box set Offset: 2px and without deselecting the new path use a very dark red or black as fill color (I used R=77 G=9 B=6). Now you should have:

10. With the red polygon selected (the one filled with the radial gradient) go on the top menu Object > Path > Offset Path… and in the option box set Offset: -4px and give a white fill to the new offset path. Now right-click on it and > Arrange > Bring to Front
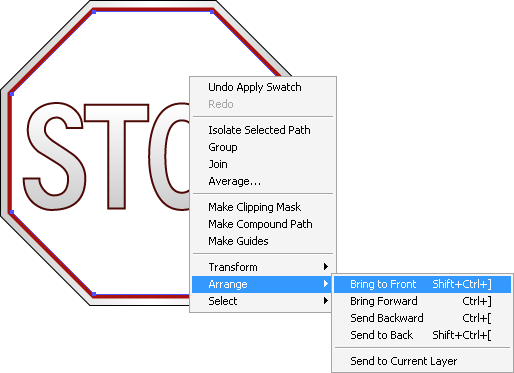
11. Select Add Anchor Point Tool (press +) and add 2 points on the sides like in the image below. Try to put them more or less in the center of the sides.
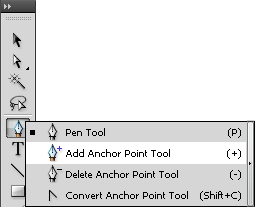
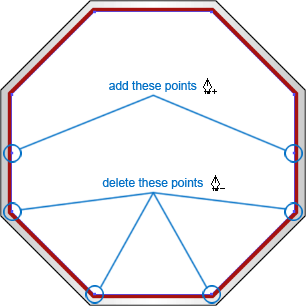
Select the Delete Anchor Point (press -) and click on the 4 points to delete them. Go back to the Add Anchor Point Tool (press +) and add an anchor point on the bottom side more or less in the middle. Select the Convert Anchor Tool (press Shift+C) and click and drag on the last point you added to the path. Play with it until you are happy with the result.
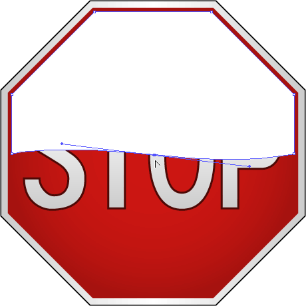
12. Get the Rectangular Tool (M) and drag a rectangular over the path you just worked on. Don’t cover it all so you select both paths in order to make an opacity mask. With Selection Tool (V) hold Shift and click the white path so you have both selected. Now go to the Transparency Window (in case it’s not open you can get it Window > Transparency) in the upper right corner click on the little arrow to get a menu and choose Make Opacity Mask.
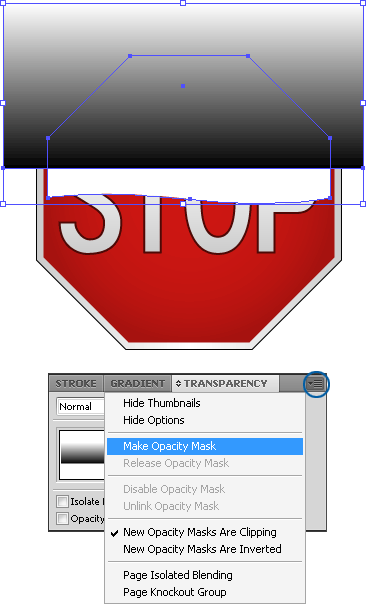
To adjust the opacity mask in the Transparency Window click on the opacity Mask so you can move it around and scale it.
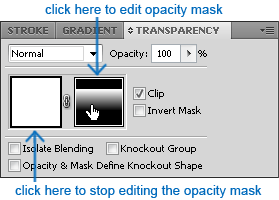
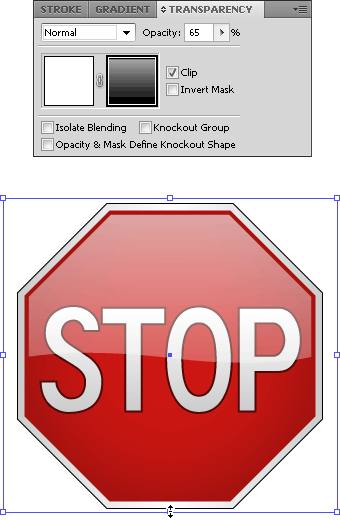
So with the opacity Mask selected scale it similar to the image below and slide the opacity to 65%.
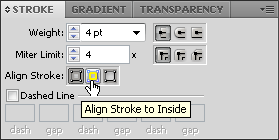
13. Select the red polygon and in the stroke window apply a 4pt stroke and align it to the inside.
Go to Object > Path >Outline Stroke to make a path out of the stroke you just made in order to give it a gradient fill. Now the red background and the outlined stroke are in a group so double click somewhere on the red to enter isolation mode and select only the outlined stroke (make sure the red octagon is not selected) and give it a linear gradient with a -90 degree angle and with the midpoint at 25%. You should use for the left color the same red that you used in the center of the radial gradient Red (R=204 G=22 B=18), but choose an even darker red than before for the right color point. (I used R=140 G=15 B=13).
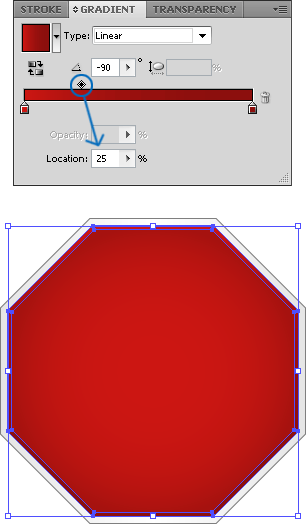
To leave the Isolation mode double click somewhere on the artboard.
14. The sign is basically done. You should put all paths in one group. Assuming you don’t have any other layers click (ctrl+A) if you have other stuff on the artboard then just drag over the stop sign with the Selection Tool to select all. Then either press Ctrl+G or right-click > Group.
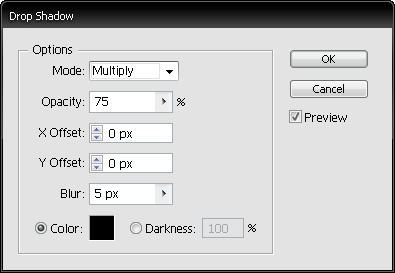
15. If you want you can also add a drop-shadow. Select the stop sign group and go to top menu and Effect > Stylize > Drop Shadow… you can use the same options as I did – see below:
The final sign should look like this:


Nice tutorial.
Very nice tutorial.
Based on your tutorial, i did a similar one, but in spanish and with Inkscape, instead of Illustrator.
Hope you like it.