Illustrator Tutorial Make a 3d Vector Pencil
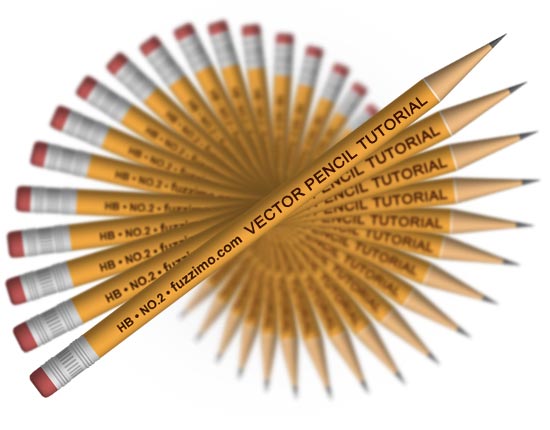
Time for another tutorial – how to make a 3d pencil using the Revolve tool in Illustrator. So just like any other project make a new document and save it. So the idea is to make a group of paths that resemble a dissected pencil and then give it a 3d volume by using the Revolve tool.
1. You will need 6 diferent shapes for the pencil parts, just as in the image below.
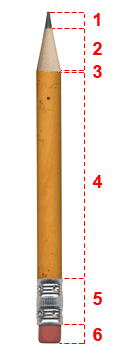
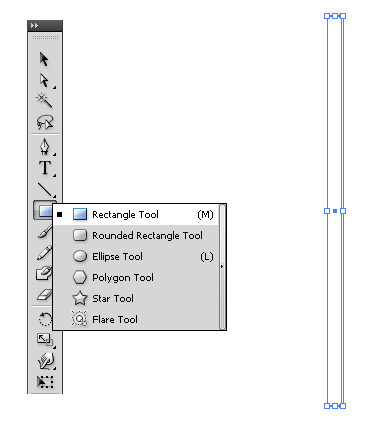
To start grab the Rectangle Tool (M) and drag out a thin rectangle.
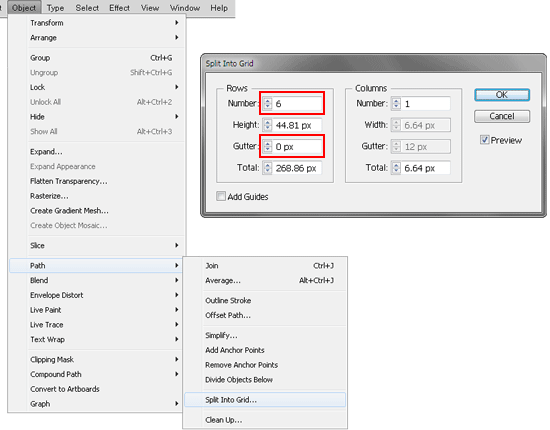
2. With the new path still selected go to top menu Object > Path >Split Into Grid. In the options window under Rows choose Number: 6 and Gutter: 0px and click OK to divide the rectangle into 6 parts.
Give each rectangle a corresponding pencil part color. (I used #666666, #f0bd84, #fdf1df, #fdb044, #e6e6e6 and #ca5e5c)

Now with the Direct Selection Tool (A) drag over intersecting points of adjacent paths to select them and then while holding Shift move the points up and down to get the right proportions.
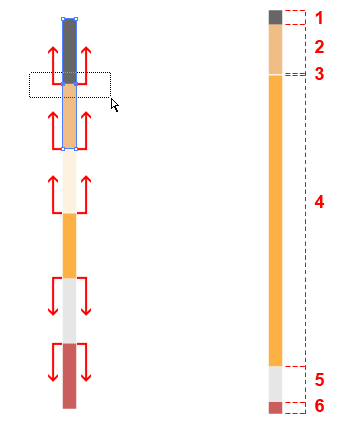
3. Now part 1,2 and 3 need to form a triangle that will be the pencil tip. Turn on the Smart Guides top menu View > Smart Guides (Ctrl+U). Now drag a rectangle exactly over those shapes. Make sure that all margins intersect.
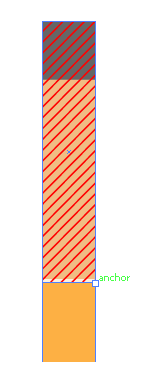
Now delete the upper right anchor point with the Delete Anchor Point Tool (-) and you can turn off the Smart Guides (Ctrl+U).
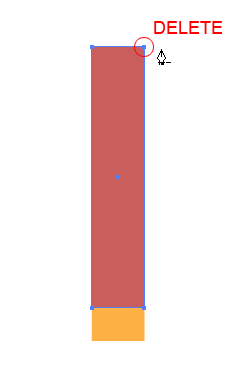
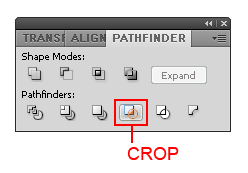
With the Selection Tool (V) select paths 1,2,3 and the overlaying triangular path and click Crop in the Pathfinder Window (top menu Window > Pathfinder)
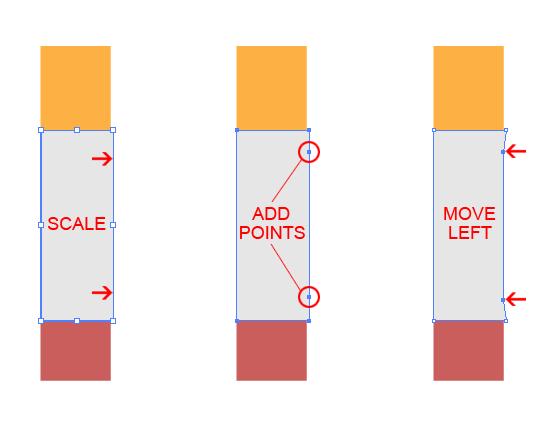
4. Now on to the metallic part (path 5) Scale the width of this rectangle by dragging the right margin just a touch. Now add two anchor points like in the image below. Select them both with the Direct Selection Tool(A) and while holding down Shift move them a touch to the left.
Grab the Rounded Rectangle Tool and drag a small path. Hold down the Alt key and drag it with the Selection Tool (V) to duplicate it and make six paths just like in the image below.

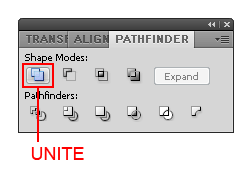
Now select the metal part and the six newly created paths and click unite in the Path Window.
5.Now for the eraser grab the Convert Anchor Point Tool and drag on the lower right anchor point to give it a rounded edge. Move the point a bit in so it looks like in the image below.

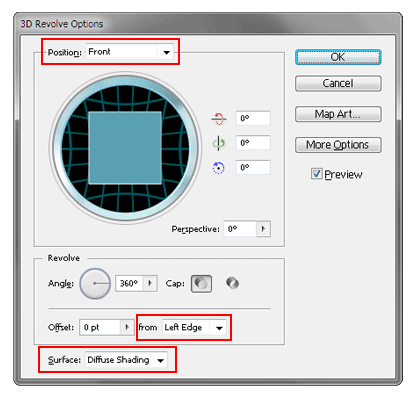
6.Now it’s time for the revolve stuff. First select all paths and group them (right-click > Group or Ctrl+G) and then go to top menu Effect > 3D > Revolve. In the options window you can choose any position you want, but for now choose Front so you can easily adjust the look of the pencil. The Surface should have Diffuse Shading since the Plastic Shading is too glossy; and check that the revolve is set from: Left Edge.
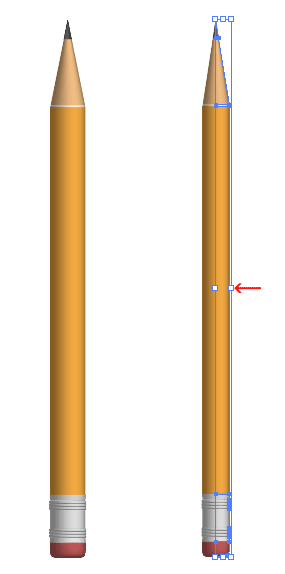
After clicking OK you should have your pencil. Now if you feel it’s a bit too thick you can easily scale it down and it will automatically reapply the 3D effect.
7. You can leave the pencil the way it is or you can go further and add some grooves to the metal part of the pencil using Map Art. First step is to create a Symbol. Grab the Rounded Rectangle Tool and drag a small thin rectangle and give it a slightly darker fill color than the metal part; then hold down the Alt key and drag it with the Selection Tool (V) to duplicate it once. Now press Ctrl+D many times to duplicate the last action a couple of times. (make sure the second rectangle is still selected when you press Ctrl+D or it won’t work).
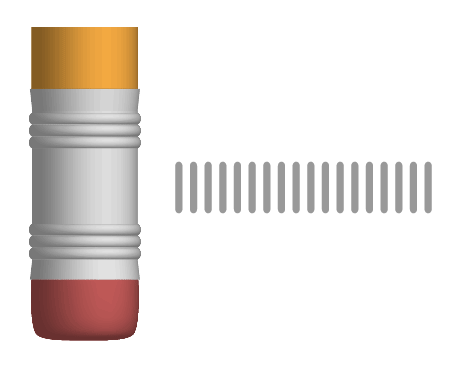
Now select all small rectangles with the Selection Tool (V) and drag them to the Symbols window (if it’s not visible – top menu Window > Symbols)
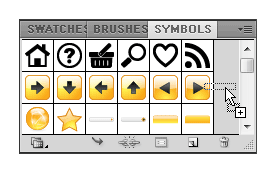
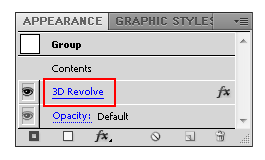
In the Symbol Options window choose Graphic and also give it a name like Pencil 01. Select the pencil and go into the 3D Revolve Options Window by clicking on 3D Revolve in the Appearance Window (top menu Window > Appearance).
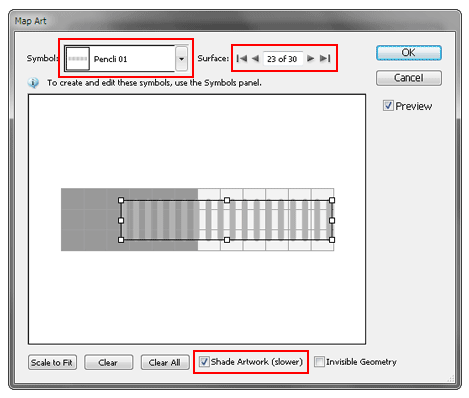
Here make sure the preview is checked and click on Map Art. In the new window click on Next Surface until you get to the one you want to overlay the symbol to. Keep an eye at the pencil to see which one is the right one. Now choose Pencil 01 symbol from the drop down list and you should see it in the preview. Drag it to the right so it covers the visible area. (Light gray area is visible). Also check shade artwork to give the symbol the same lighting effect as the pencil.
You can also wrap some text on the pencil using the Map Art feature. So type your text and drag it to the Symbols window. Go back into the 3D Revolve Options Window > Map Art, select the surface and place your new symbol. Rotate and align the text to get your desired result.

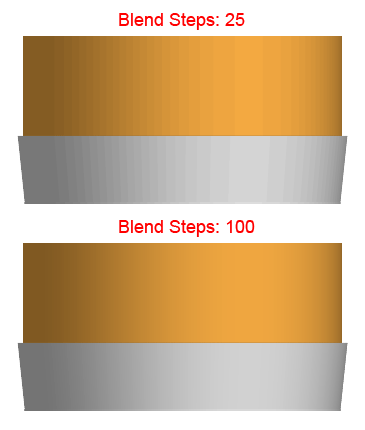
8. Another thing to point out is that if you export it as a higher resolution image and the surface doesn’t look smooth enough then go to the 3D Revolve Options Window and click More Options. There increase the Blend Steps until the surface looks smooth.

Great tut! thank you for sharing :D
There are heaps more of the same over at: http://www.tutorialshock.com
Its really looks like real pencil i like this interesting methods to make this 3d pencil.
Thanks for hare this tutorial post with us.Its helps me a lot to improve my skills on 3D.
Thanks,
very nice this lesson .
thanks
Very nice, thank you very much
Thanks for sharing. I’m new at this, and it’s a great way to learn all the different options. I’m more used to photoshop. But, I did run into something. When making it into 3D the pencil turned black. Not sure why that happened. Any idea?
I think you may have the stroke color set to black. If you do, just remove it (set it to none). Hope that helps. If it doesn’t, let me know.
I tried getting rid of the stroke but it turns grey after that. If I double click on the image, I can see the color. I can even change it, but it doesn’t become visable. Weird huh!
Hmmm, don’t know why that’s happening. I’ll email you and maybe you can send me the Illustrator file you’re working on.
What if i wanted to rotate it. Say i wanted to have it on an angel instead of a 90 degree angle. Also i ran into trouble making it smaller height wise. The eraser would disappear.
To rotate, select it and go to the Appearance window (if you don’t have it open, top menu Window > Appearance) and click on 3D Revolve. In the options window check the Preview box and you can drag the cube or enter x,y,z axis values to rotate it however you want. If you click on More Options you can also play with the light source settings.
To change its height, grab the Direct Selection Tool(A) and drag to select the whole tip including the top 2 anchor points of the yellow section. Hold Shift and drag the selected points to shorten it. You can also use the arrows on your keyboard to move the points. Depending on the angle of the pencil it might help to hide the 3D effect while you scale it. Just click on the eye icon next to it in the Appearance window.
Wow! I’m impressed! The tutorial, your site… Top notch!
I am getting confused at step 3. I am not able to create the pencil tip. Can anyone help me?
Hi James,
You have to draw a path with the Rectangle Tool and cover the areas 1,2 and 3 (red shaded area – first image in step 3).
You need to overlap those areas perfectly – to do so turn on the Smart Guides to help you while you drag/resize the rectangle on top. After that you should have a rectangle like in the second image in step 3. Delete the upper right anchor point and then you’ll have a triangle – select the triangle plus the areas 1,2 and 3 and click on Crop in the Pathfinder Window (third image in step 3).
Hope that helps – let me know if you still have problems with it.
Wow! I can’t believe I just drew a 3-D pencil! Thank you!!!
Thank you for this very simple explanation of tutorial
good work