Illustrator – Triangles and Angles Tutorial
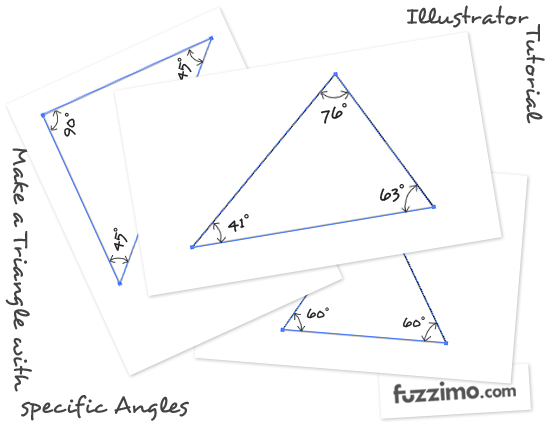
While working on the previous post with the Vector Rulers I played with the making of a triangle in Illustrator. The easiest way to do one is with the Polygon Tool and that works fine if you do not get too mathematical and need a triangle with specific angle degrees. Since creating triangles in Illustrator is not so straight forward, here are some ways to draw them.
1. Equilateral Triangle – To make a simple triangle in Illustrator just grab the Polygon Tool.
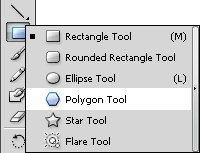
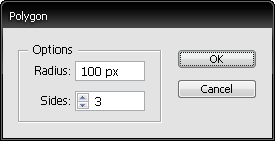
Click on the artboard and in the polygon option window choose 3 sides. The radius doesn’t really matter since you can scale the triangle afterwards to whatever you need.
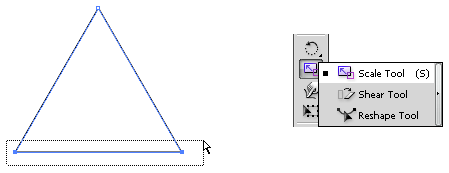
So by doing that you now have an equilateral triangle. Now you can use the Direct Selection Tool (A) to select anchor points and drag them around to adjust the triangle to your needs. If you want to keep the triangle isosceles, then select two anchor points and using the Scale Tool (S) and holding Shift drag the selected points to change the triangle.
Just as a note, when using the Polygon Tool you can also change the number of sides of the polygon by holding left click and dragging and while still holding down the left click use the up and down directional arrows on your keyboard to increase or decrease the number of sides.
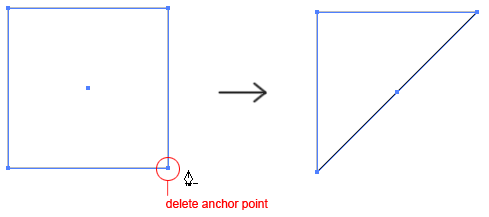
2. Right Angle Triangle – To make a right angle triangle grab the Rectangle Tool (M) and drag a rectangular shape. If you want to do a right angle isosceles triangle then hold the Shift key to drag a square. Now all you have to do is delete an anchor point with the Delete Anchor Point Tool (-) and you have a right angle triangle.
3. Specific Angle Triangle -This is what I was trying to do for the Vector Rules where I needed a triangle with 90, 60 and 30 degree angles. I wanted it to be accurate instead of just approximate. This is still an easy triangle to sort of approximate, but what if you needed even more specific angle degrees, let’s say a 76, 63, 41 angle triangle – Here’s a way to do that; grab the Rectangle Tool (M) and drag a long and thin rectangle.
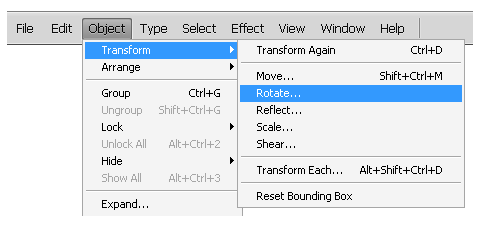
Now with it selected Copy (Ctrl+C) and Paste in Front (Ctrl+F). With the new rectangle still selected go to top menu Object > Transform > Rotate (or right click Transform > Rotate).
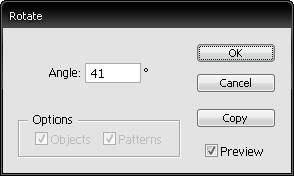
In the rotate window put 41 degrees and click OK.
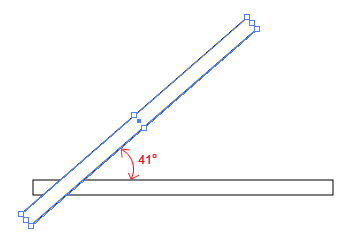
Move the newly rotated rectangle a bit up and to the left. Now the overlapping rectangles make a 41 degree angle.
With the new rectangle still selected Copy and Paste in Front again and go to Object > Transform > Rotate and in the window put 76 degrees and click OK. Move the new rotated rectangle a bit to the right and up so it looks something like the image below.
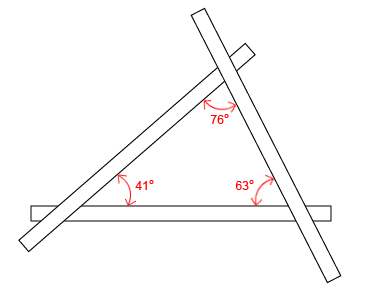
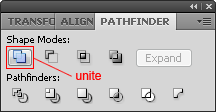
Now the rectangles make a triangle with 76, 63, 41 degree angles. So to extract the triangle select all three rectangular shapes with the Direct Selection Tool (V) and in the Pathfinder window (if you do not have it open go to top menu Window > Pathfinder) click on Unite.
Now with the Direct Selection Tool (A) and holding Shift select the three points as in the image below and Copy and Paste.
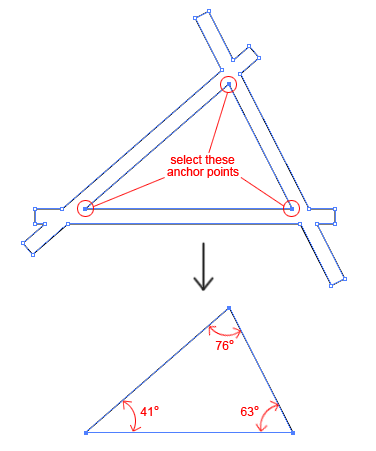
and now you have the triangular shape with the accurate angles that you wanted. If you need to scale it to fit a project hold the Shift while you scale so it maintains its proportions.
So that’s pretty much it; Happy designing and I hope you’ll find this tutorial usefull for your projects.

Tip #3 is priceless… never thought about that!
Thanks
Thanks!!! great tips – all are priceless.
Brilliant. Thanks for the idea!
1)Hello, I want to learn how to draw those red arrows which indicate the span of the angle degrees.
Would be thankful if you can you help me with this.
2)Also, what’s the font type you’ve used for the ‘if you like this post please share’?
Thanks :)
Hi Anooj,
One way you can do the arrows is:
• grab the Line Tool (U) and draw a line.
• from top menu Edit>Transform Path>Warp – then right under that top menu you should have a drop down option box where it says Warp: Custom. Click and select Arc.
• for the arrow heads you can grab the brush tool and draw them or you can use the line tool and then rotate each segment into position.(Edit>Transform Path>Rotate)
• the font you asked about is called Desyrel and you can get it from dafont.com.
Hi Antoniu,
Regarding the instructions you gave to me about the arrows – I don’t seem to see the options as you have described in AI CS5. Maybe it got changed? Can you please help?
I’ve tried search for almost everywhere where it has transform Path > Warp. But I don’t seem to see that. Please help.
Sorry, I should have mentioned that was in Photoshop. I prepared the screenshots in PS. In Illustrator you can do the curved line with the Arc Tool (grouped with the Line Segment Tool) – while you click and drag with the Arc Tool you can change its curvature with the up/down arrows on your keyboard. Also hold Shift before you let go the mouse to maintain proportions. For the arrow heads you can use the Pen Tool or the Line Segment Tool.
ba da bababa! im lovin it!
On step 3 I cannot get the anchor points at the points of intersection for me to select then copy paste.
Make sure the shapes are united and that you have the Direct Selection Tool (A) and not the Selection Tool (V). Then go with the Direct Selection Tool (A) over an anchor point and click to select it. Hold Shift and click on the remaining 2 points to select them together.
Another way to do it is to just click with the Direct Selection Tool (A) on one of the outer lines and press Delete 2 times.
I’m trying to draw a scalene triangle that has these angles 10 degrees & 20 degrees would you help
Follow step 3 Specific Angle Triangle and instead of 41 and 76 used in the tutorial, put 10 and 20.
Thank! it was really helpful !
This rocks (tip #3)! I was getting frustrated trying to create an acute angle scalene triangle without using Photoshop. Thanks for the tip!
Best specific-angle triangle tips. Ever.
I’ve been doing what you do with the rectangles with lines, then adding points to the lines at the overlaps, deleting the end points of the “waste,” then joining the points at the tips . . . but inevitably the angle wriggles a tiny bit from the degree it is supposed to be.
I will pass this great set of directions along. Thanks very much!
u’ve no idea how much i thank u for this…
since im not a graphic designer, but i love to illustrate, sometimes i just… just… and this is lovely. thank u very much!
THANK YOU!!!! SUPER HELPFUL!
(I googled my question and so many other websites totally didn’t answer it, but this was amazing!)